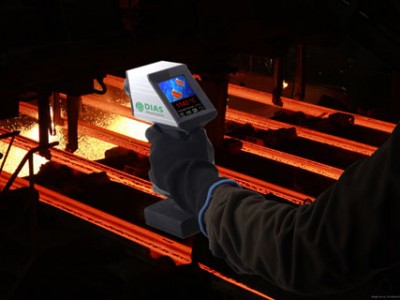
Based on many years of experience in stationary thermal imaging devices for the measurement of high temperatures DIAS Infrared brings a flexible portable and robust infrared camera for short-wave measurement of high temperatures for the first time on the market. By using a high-dynamic-Si array a continuous range of 600 ° C to 1500 ° C or optional 1400 ° C to 3000 ° C is realized.
The device PYROVIEW 480N portable is measuring online thermal images with 480 x 360 pixels and a frame rate of 25 Hz. The thermal images are displayed user-friendly on a touchscreen display. The display of the center-temperature or maximum temperature is carried out with the visualization of the measuring point as a numerical value. The camera allows the recording of still images and sequences. An Ethernet (RJ45) port transmits the data to a PC. The operator can adjust easily and intuitively essential parameters of the camera via the input on the touch screen.
Measurements in metallurgy, ceramics and cement industry as well as in glass manufacturing and processing are the preferred applications of the new portable infrared camera. The thermal imagers PYROVIEW 480N portable are available from the 2nd quarter in 2016.
Drastic failure reduction in non-contact temperature measurement to 3000 ° C at short wavelengths
The emissivity in harsh environments in metallurgy has significant influence on the temperature measurement accuracy. Measurements at short wavelengths can reduce this influence significantly. For example if, at a substrate temperature of 1200 °C, the emission factor is set to 10 percent incorrectly, there is a resulting measurement error of only 1.3 percent in the spectral range from 0.8 microns to 1.1 microns. However, is a thermal imager in the longwave standardized spectral range from 8 microns to 14 microns used, the measurement error is more than 11 percent, or almost 140 °C. With increasing object temperature the percentage measurement error is even greater. The short-wave measurement is therefore imperative to ensure high measurement accuracy and thus in the end the desired material properties or the quality of the workpieces.


